Wednesday, June 1, 2016

Posted by Unknown |
Photo Tips for Christmas Lights

If you're able to take a moment away from the holiday rush of festivities and last minute shopping, soak in the environment around you to identify the rich decorations, vibrant colors and twinkling lights that come with the Christmas season. These are all beautiful elements that can make for fabulous photographs. Christmas lights are a traditional holiday decoration, but they can be particularly difficult to photograph. By following some simple tips, you can capture their essence even with a basic digital camera.

Timing

    Somewhere between sunset and full dark, you'll have about a 10-minute window of perfect light for shooting Christmas lights.
    Somewhere between sunset and full dark, you'll have about a 10-minute window of perfect light for shooting Christmas lights.

    The key to a beautiful Christmas light image is the timing. For a composition that includes holiday lights plus other objects such as the sky or a house, you must take the photograph at the right time of day to be able to properly expose both the background and the lights. Be prepared with your holiday lights on and camera ready around sunset. The right light will appear between sunset and full darkness. Including the sky in the frame will add another element to your photograph.

Manual Settings

    If you are working with a digital SLR camera, you can fine-tune your exposure by manually controlling your aperture and shutter speed. Start by stopping your aperture down to f/14 or more. Your lens now has a greater depth of focus, allowing the lights to appear more crisp. Next, play with the shutter speed until you have the right exposure. Because you are working with a generally low-light setting overall, anticipate the shutter speed to be around 1 second to make up for the lack of light being allowed in with this aperture setting.

White Balance and Lighting

    Try the tungsten setting on your camera to get the right white balance for Christmas light bulbs.
    Try the tungsten setting on your camera to get the right white balance for Christmas light bulbs.

    The metal in the filament of most Christmas light bulbs is called "tungsten." This used to be the standard for many household light bulbs (incandescent bulbs) until they started getting phased out by more energy-efficient options. Incandescent bulbs emit a light with a blue tint that the human eye adjusts to automatically, but a camera does not. Because of this type of bulb, you want to adjust your camera to the tungsten white balance setting on your camera. This is often displayed with a light bulb icon. By creating this balance for the camera, you will bring out the true colors of the lights as the human eye sees them. In addition, turn off the flash. Turning off the flash will allow you to capture the magical glow of the lights.

Stability

    Use a camera tripod for stabilization, or brace the camera some other way to prevent shake and blurring of Christmas lights.
    Use a camera tripod for stabilization, or brace the camera some other way to prevent shake and blurring of Christmas lights.

    You will most likely have a long shutter speed to make up for the low aperture setting, so it is recommended you use a tripod for stabilization. While many cameras or lenses now have stabilization features, this will not be enough to turn out a crisp image with these long exposure windows. You can also set the timer on your camera and place it on a stable surface. This way, the camera will be completely motionless when it takes the picture because you won't have to be pressing the button at the same time.


Photo Tips for Christmas Lights

If you're able to take a moment away from the holiday rush of festivities and last minute shopping, soak in the environment around you to identify the rich decorations, vibrant colors and twinkling lights that come with the Christmas season. These are all beautiful elements that can make for fabulous photographs. Christmas lights are a traditional holiday decoration, but they can be particularly difficult to photograph. By following some simple tips, you can capture their essence even with a basic digital camera.

Timing

    Somewhere between sunset and full dark, you'll have about a 10-minute window of perfect light for shooting Christmas lights.
    Somewhere between sunset and full dark, you'll have about a 10-minute window of perfect light for shooting Christmas lights.

    The key to a beautiful Christmas light image is the timing. For a composition that includes holiday lights plus other objects such as the sky or a house, you must take the photograph at the right time of day to be able to properly expose both the background and the lights. Be prepared with your holiday lights on and camera ready around sunset. The right light will appear between sunset and full darkness. Including the sky in the frame will add another element to your photograph.

Manual Settings

    If you are working with a digital SLR camera, you can fine-tune your exposure by manually controlling your aperture and shutter speed. Start by stopping your aperture down to f/14 or more. Your lens now has a greater depth of focus, allowing the lights to appear more crisp. Next, play with the shutter speed until you have the right exposure. Because you are working with a generally low-light setting overall, anticipate the shutter speed to be around 1 second to make up for the lack of light being allowed in with this aperture setting.

White Balance and Lighting

    Try the tungsten setting on your camera to get the right white balance for Christmas light bulbs.
    Try the tungsten setting on your camera to get the right white balance for Christmas light bulbs.

    The metal in the filament of most Christmas light bulbs is called "tungsten." This used to be the standard for many household light bulbs (incandescent bulbs) until they started getting phased out by more energy-efficient options. Incandescent bulbs emit a light with a blue tint that the human eye adjusts to automatically, but a camera does not. Because of this type of bulb, you want to adjust your camera to the tungsten white balance setting on your camera. This is often displayed with a light bulb icon. By creating this balance for the camera, you will bring out the true colors of the lights as the human eye sees them. In addition, turn off the flash. Turning off the flash will allow you to capture the magical glow of the lights.

Stability

    Use a camera tripod for stabilization, or brace the camera some other way to prevent shake and blurring of Christmas lights.
    Use a camera tripod for stabilization, or brace the camera some other way to prevent shake and blurring of Christmas lights.

    You will most likely have a long shutter speed to make up for the low aperture setting, so it is recommended you use a tripod for stabilization. While many cameras or lenses now have stabilization features, this will not be enough to turn out a crisp image with these long exposure windows. You can also set the timer on your camera and place it on a stable surface. This way, the camera will be completely motionless when it takes the picture because you won't have to be pressing the button at the same time.


  • About Photography

    photography.about.com

    About.com Photography is the place for photo lessons, tips, contests, reviews, friendly forums, free desktop wallpapers, and much more.


  • Strobist: How to Photograph Christmas Lights

    strobist.blogspot.com/2006/12/how-to-photograph-christmas-lights.html

    Dec 13, 2006 Normally when we talk about balancing light on Strobist, it usually means balancing ambient with flash. But getting good photos of holiday lights


  • Christmas Photo Cards Holiday Photo Cards Photo Christmas

    www.photocarddesigns.com/holiday-christmas-photo-cards.htm

    Custom Christmas Photo Cards and Holiday Photo Cards from modern to traditional styles. Matching address labels available too!


  • Family photography tips for taking perfect family photography

    www.best-family-photography-tips.com

    Learn FAMILY PHOTOGRAPHY TIPS the pros use. Includes killer advice on indoor, outdoor, night time & everywhere tips.


  • Portrait Photography guide and tips from Photo.net - Page 2

    photo.net/learn/portraits/?p=2

    Our guide to portrait photography contains tips, equipment suggestions, and ideas at Photo.net.


  • Taking Pictures of your Christmas Tree August Tea Photography ...

    www.augustteaphotography.com/taking-pictures-of-your-christmas-tree

    Ive had a couple clients ask me how to take pictures of their christmas tree, do you use the flash? no flash? lights on in your house? lights off? daytime? nighttime?


  • How to Hang Christmas Lights HomeTips - HomeTips Expert

    www.hometips.com/diy-how-to/install-christmas-lights.html

    Even a beginning DIYer can hang holiday lights like a pro in two hours or less with these tips.


  • Photo Tips

    www.kodak.com/.../Tips_Projects_Exchange/Learn/Photo_Tips.htm

    Tips for Great Pictures, Kodak provides advice on photography. Learn the art of photography at Kodak.com


  • Photography and Photos of the Day - National Geographic

    photography.nationalgeographic.comWallpapers Photo of The Day Landscapes Animals People and Culture

    National Geographic is the source for pictures, photo tips, free desktop wallpapers of places, animals, nature, underwater, travel, and more, as well as photographer ...


  • Photography - Wikipedia, the free encyclopedia

    en.wikipedia.org/wiki/Photography

    Photography (derived from the Greek photos- for "light" and -graphos for "drawing") is the art, science, and practice of creating durable images by recording light


  • Christmas Lights Personalized Photo Cookie Gift Tins

    www.personalizationmall.com/Christmas-Lights-Personalized-Photo...

    Buy Christmas Lights Personalized Photo Cookie Gift Tins and search for personalized Christmas Clearance from PersonalizationMall.com


  • Welcome to Ugly Christmas Lights.com!

    www.uglychristmaslights.com

    Ugly Christmas Lights ... This site is here to show those houses where the residents are likely celebrating a happy holiday, but have no sense of decency in how they ...


  • Simple Photo Tips: Use your tablet computer as a light source:

    connect.dpreview.com/post/6259749917

    You can use your tablet computer as a light source to create an interesting and colorful platform for small still life subjects.

  • 23 Christmas Lights Photos With a Twist

    digital-photography-school.com/20-christmas-lights-photos-with-a-twist

    Its beginning to look a lot like Christmas so I thought Id take a look at what people are posting on Flickr and saw this theme emerging.
Posted by Unknown |
DIY Backdrop with a Painter's Canvas for Photography

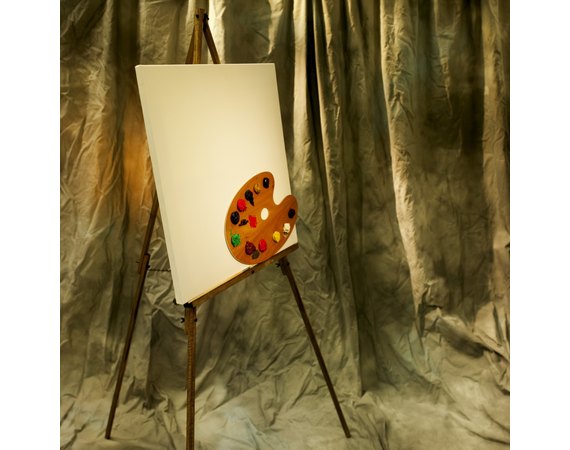
Photography backdrops can be expensive. Making your own can save you money and give your photos a unique signature style. Backdrops that are production line will give your portraits a production line look. Production line backdrops are photography backgrounds that are produced in a factory. Each backdrop is reproduced over and over. You can find these in the photo studios that sell packaged portraits. Backdrops made from a painter's dropcloth are inexpensive, fairly easy to make and easy to change. You can back-light them to give an added dimension to your photos.

Instructions

Cleaning

    1

    Wash your painter's dropcloth in warm water with laundry detergent. Rinse well with cold water. This process removes any dirt and dust. The dye takes better on a clean dropcloth. Do not dry.

    2

    Heat 9 gallons of water until hot. The hotter the dye, the better it absorbs into your canvas.

    3

    Mix the dye according to the directions on the package. The salt helps set the dye and keep your backdrop from bleeding its color out.

    4

    Tie your painter's dropcloth with the twine. Make small or large gathers with the cloth, twist the gathers and tie. Do this step only if you want a variegated color for your photography backdrop. If you want a solid color, do not tie with twine.

    5

    Pour the hot water into the large tub and mix in the dye and salt mixture. Use the wooden spoon and mix well.

    6

    Place your painter's dropcloth into the hot water dye mix. Submerge completely using the wooden spoon.

    7

    Turn the backdrop every 5 to 10 minutes in the dye. This gives the cloth a more even coloring. The cloth should steep in the dye for 1/2 hour unless otherwise directed in the instructions.

    8

    Remove your dropcloth and cut the twine if you used any. Rinse with cold water until water runs clear. Wring out and dry.


DIY Backdrop with a Painter's Canvas for Photography

Photography backdrops can be expensive. Making your own can save you money and give your photos a unique signature style. Backdrops that are production line will give your portraits a production line look. Production line backdrops are photography backgrounds that are produced in a factory. Each backdrop is reproduced over and over. You can find these in the photo studios that sell packaged portraits. Backdrops made from a painter's dropcloth are inexpensive, fairly easy to make and easy to change. You can back-light them to give an added dimension to your photos.

Instructions

Cleaning

    1

    Wash your painter's dropcloth in warm water with laundry detergent. Rinse well with cold water. This process removes any dirt and dust. The dye takes better on a clean dropcloth. Do not dry.

    2

    Heat 9 gallons of water until hot. The hotter the dye, the better it absorbs into your canvas.

    3

    Mix the dye according to the directions on the package. The salt helps set the dye and keep your backdrop from bleeding its color out.

    4

    Tie your painter's dropcloth with the twine. Make small or large gathers with the cloth, twist the gathers and tie. Do this step only if you want a variegated color for your photography backdrop. If you want a solid color, do not tie with twine.

    5

    Pour the hot water into the large tub and mix in the dye and salt mixture. Use the wooden spoon and mix well.

    6

    Place your painter's dropcloth into the hot water dye mix. Submerge completely using the wooden spoon.

    7

    Turn the backdrop every 5 to 10 minutes in the dye. This gives the cloth a more even coloring. The cloth should steep in the dye for 1/2 hour unless otherwise directed in the instructions.

    8

    Remove your dropcloth and cut the twine if you used any. Rinse with cold water until water runs clear. Wring out and dry.


  • Diy Canvas Paintings How To by jannypie on Cut Out + Keep

    www.cutoutandkeep.net Art, Design & Photography Paintings

    How To: DIY Canvas Paintings. These are a set I made a couple of years ago and get lots of compliments on them (although I actually don't like them that much). I've ...


  • Make Frames Crafts for Kids : Making Photo Frames with DIY Arts ...

    www.artistshelpingchildren.org/photoframespictureframesartscrafts...

    Make Frames Crafts for Kids : Making Photo Frames with DIY Arts and Crafts Instructions for Children, Teens, Preschoolers


  • 20+ DIY Wall Art Projects: Crafty Ideas : TipNut.com

    tipnut.com/glazed-wall-art

    Knock Off Pottery Barn Clock: A round clock face with roman numerals is painted on a square of plywood, painted for a weathered look. Not a working clock since ...


  • DIY Easter Photo Backdrops eHow - eHow How to Videos,

    www.ehow.com Easter Easter Decorations

    Professional studio photography backgrounds can cost hundreds of dollars to buy. Making your own photography backdrop is much less expensive and can be made


  • Dream Green DIY

    www.dreamgreendiy.com

    So, when last I left you I was chatting about those two lovely ladies on either side of me and the wild shenanigans we got into over the weekend at Curtains ...


  • How to Make An Inexpensive Light Tent DIY

    www.digital-photography-school.com/how-to-make-a-inexpens

    The following tutorial on constructing an Inexpensive Light Tent was Submitted by Jeffrey Bail over at our Forums. I thought it was well worth highlighting here on ...


  • Craft Projects: Easy Craft Ideas, Kids Crafts, & Holiday Crafts

    www.diynetwork.com/topics/crafting/index.html

    Channel your inner rock star the DIY way with these fun-to-make fashion accessories. Bring on the glam with this rock-inspired belt buc...


  • 17 More DIY wall Art Ideas - Home decorating trends- Interior ...

    www.homedit.com/17-more-diy-wall-art-ideas

    Continuing the idea from our previous article (check out 15 Best and Easy DIY Wall Art Ideas) we are now back with even more creative suggestions. So here


  • DIY Photobooth Wall Ruffled

    ruffledblog.com/diy-photobooth-vintage-wallpaper-frame-wall-backdrop

    This may be the ultimate DIY project for weddings this season. Specially if I tell you that Laura and her fianc made this photobooth wall for only $80. Using ...


  • 16 Nifty Clock Projects: DIY : TipNut.com

    tipnut.com/domino-clock-diy

    Making a customized clock for your space is easier than you might think, all you need is a kit or parts from an old clock and a few other supplies (paint, mod podge ...

Posted by Unknown |
How to Design Photographers' Wedding Albums

Designing a photographer's wedding album creates a variety of challenges and artistic rewards. Confirming the layout of images poses many creative challenges, but once finished, the client will enjoy a beautiful album. The layout method will vary dramatically based on the album printer, so choose a printer wisely and look for one with a user-friendly, digital layout and an uploading system to create the album.

Instructions

    1

    Choose a printer for the album prior to the designing process. The printer will determine the number of pages, sizes of layouts, images and the types of color printing involved in creating the album. Many printers will also provide layout software and guides to help with the designing process.

    2

    Review the images from the wedding, select the top edits and place them in a computer file folder. The final number of images in the album will depend on the size and price of the chosen album but should average 50 to 75 images. Ensure that all images are converted to a print resolution of 300 dpi or higher. Anything lower than 300 dpi might produce lower-quality, pixelated images. Use the image size settings in a photo editing software program to adjust the resolution on the images.

    3

    Use a printed version of the album layout to determine which images will be placed in what locations. This step can be accomplished in a variety of ways. One method is to take the page spreads and lay them in order on a large table. Take cardboard cutouts of the various sized images for each spread and place them in the desired layouts for each page spread. Take the proofs of your top edits, printed with file names from a low-budget printer on regular paper, and place them in each spot on the page spread. Another method utilizes digital layout software, and this will vary greatly based on the printer and the type of album.

    4

    Repeat the above step for each page spread of the album. Then write on the page spread the file name and the appropriate size of the image to be displayed. Another option is to tape each proof to the page spread to visualize the layout as it is converted to a digital layout. Use this layout guide when uploading the images and placing them in the album layout for the printer.

    5

    Upload the images to the printer's layout software and place the images in the proper locations based on the layout guide. Again, this step will vary dramatically depending on printers. For traditional albums with photos that slide into an existing layout in the book, print the images to the appropriate dimensions based on the layout guide.

    6

    Finalize the design and order the wedding album according to the bride's requirements.


How to Design Photographers' Wedding Albums

Designing a photographer's wedding album creates a variety of challenges and artistic rewards. Confirming the layout of images poses many creative challenges, but once finished, the client will enjoy a beautiful album. The layout method will vary dramatically based on the album printer, so choose a printer wisely and look for one with a user-friendly, digital layout and an uploading system to create the album.

Instructions

    1

    Choose a printer for the album prior to the designing process. The printer will determine the number of pages, sizes of layouts, images and the types of color printing involved in creating the album. Many printers will also provide layout software and guides to help with the designing process.

    2

    Review the images from the wedding, select the top edits and place them in a computer file folder. The final number of images in the album will depend on the size and price of the chosen album but should average 50 to 75 images. Ensure that all images are converted to a print resolution of 300 dpi or higher. Anything lower than 300 dpi might produce lower-quality, pixelated images. Use the image size settings in a photo editing software program to adjust the resolution on the images.

    3

    Use a printed version of the album layout to determine which images will be placed in what locations. This step can be accomplished in a variety of ways. One method is to take the page spreads and lay them in order on a large table. Take cardboard cutouts of the various sized images for each spread and place them in the desired layouts for each page spread. Take the proofs of your top edits, printed with file names from a low-budget printer on regular paper, and place them in each spot on the page spread. Another method utilizes digital layout software, and this will vary greatly based on the printer and the type of album.

    4

    Repeat the above step for each page spread of the album. Then write on the page spread the file name and the appropriate size of the image to be displayed. Another option is to tape each proof to the page spread to visualize the layout as it is converted to a digital layout. Use this layout guide when uploading the images and placing them in the album layout for the printer.

    5

    Upload the images to the printer's layout software and place the images in the proper locations based on the layout guide. Again, this step will vary dramatically depending on printers. For traditional albums with photos that slide into an existing layout in the book, print the images to the appropriate dimensions based on the layout guide.

    6

    Finalize the design and order the wedding album according to the bride's requirements.


  • Photography community, including forums, reviews, and galleries ...

    photo.netBrowse Gallery Gallery Top Photographers Random Gallery Image

    Photo.net is a photography community that includes forums, reviews, and galleries for members and casual viewers.


  • How to model, find photographer images, castings, model jobs

    www.onemodelplace.com

    How to model? OMP provides a large, focused active audience for the fashion, photography and beauty markets. Models find casting calls, model jobs and photographer.


  • Leading Wedding Photographers in Tulsa, OK Tulsa Wedding ...

    www.epicphotostulsa.com

    Need Tulsa photographers to cover your wedding? We have wedding photographers in Tulsa, OK who can make your wedding an event to remember for the rest of your life.


  • Blurb - Beautiful photo books and book printing. Make your own ...

    www.blurb.comAll Books Sign In Bookstore Make Books Photo Books

    Make your own book. Create beautiful photo books, custom books, wedding albums, cookbooks, photo albums. Make, publish, share and sell your book.


  • Wedding, Special Event, Party and Meeting Event Venues,

    www.gatheringguide.com

    When planning your next event, use the Gathering Guide to find the best event venue, caterer, event planner, photographer and other event vendors to make your wedding ...


  • Get Your Ex Lover Back In Your Life And In Love With You Again ...

    lonelinesstohappiness.com

    You can still get your ex back in your life and very much in love with you again. Learn a cutting edge approach to get your ex lover or spouse back and give your ...


  • HOW TO MAKE YOUR CHILD A MODEL IN NEW YORK D&G Wedding

    www.dgphotostudio.com/modeling/children-modeling

    Hi, I am Galina Samsonov, a photographer and a mother of two successful child models employed by one of the top 5 modeling agencies in the world.


  • Photography Websites, Website Design, Website Templates

    www.livebooks.com

    liveBooks is the leader in professional websites for photographers, website templates, website design and mobile iPad and iPhone sites.


  • Collages.net - Professional Color Lab, Albums, Books, Design ...

    www.collages.net

    Guests. Continue to the guest login page to view your event. View Photos


  • SITEHOUSE - Customizable Website Designs For Creatives by

    www.sitehousedesigns.com

    Style Group website designs for Show It fast. ... Customizable Website Designs For Creatives by Promise Tangeman

Posted by Unknown |
How to Create the Shepard Fairey Obama Hope Effect

The most iconic art to emerge out of the 2008 presidential campaign was Shepard Fairey's Obama "Hope" poster. The image was everywhere, on T-shirts, posters, billboards and made a little-known artist a household name. Of course, if you can do it, there's got to be a GIMP plugin--and sure enough there is--a Script-Fu script you can download from the GIMP Plugin Registry.

Keep in mind, however, the script creates the effect; it doesn't mean you have the creative mind of Shepard Fairey. But it's easy to turn your image into a Shepard Fairey-type poster. Follow these easy steps and find out how.

Instructions

    1
    Open Image

    Download the elsamuko-obama-hope.scm file from the GIMP Plugin Registry (see Resources below) before you open GIMP. Make sure the file is placed in the scripts folder located at //user/application support/Gimp/Scripts. Open GIMP and your test photo image. Click on the FILTERS tab and open the control panel, which is located under ARTISTIC filters.

    2
    Tool Box

    Make adjustments to your image with the tool panel, which offers a number of choices. Notice you can select the three different colors for the effect and the threshold for each color. This allows you to design the color of the poster image and "paint" with the colors of your choice.

    3
    Default Settings

    Try your image with the default settings first to get an idea of how the effect works. Notice the stripes that run through the image; you can change this to circles or squares depending on your image. Think of the basic color as the midtones and the other colors controlling the highlights, quartertones and shadows. Experiment with the colors until you get what you want. There is no preview function so you need to render and undo as you learn how to use the effect.

    4
    Color Change

    Try changing one color at a time and adjust the threshold. You can also try changing the thickness and corn size to change the impact. After making a color change, undo the change and then change another color. Keep doing this until you feel you understand the impact the changes have on the image.

    5
    Final Image

    Once you have experimented, make the changes you want and click OK to create the image. Save the image under a new name to protect the integrity of your image archive. You can then add stylized text to finish your poster. The result will be an image that mimics the Obama "Hope" poster. This is an easy way to create an artistic poster image from one of your existing images. Although the popularity of the Shepard Fairey style will eventually wane, the tool will remain as an easy way to create an art poster from a photo.


How to Create the Shepard Fairey Obama Hope Effect

The most iconic art to emerge out of the 2008 presidential campaign was Shepard Fairey's Obama "Hope" poster. The image was everywhere, on T-shirts, posters, billboards and made a little-known artist a household name. Of course, if you can do it, there's got to be a GIMP plugin--and sure enough there is--a Script-Fu script you can download from the GIMP Plugin Registry.

Keep in mind, however, the script creates the effect; it doesn't mean you have the creative mind of Shepard Fairey. But it's easy to turn your image into a Shepard Fairey-type poster. Follow these easy steps and find out how.

Instructions

    1
    Open Image

    Download the elsamuko-obama-hope.scm file from the GIMP Plugin Registry (see Resources below) before you open GIMP. Make sure the file is placed in the scripts folder located at //user/application support/Gimp/Scripts. Open GIMP and your test photo image. Click on the FILTERS tab and open the control panel, which is located under ARTISTIC filters.

    2
    Tool Box

    Make adjustments to your image with the tool panel, which offers a number of choices. Notice you can select the three different colors for the effect and the threshold for each color. This allows you to design the color of the poster image and "paint" with the colors of your choice.

    3
    Default Settings

    Try your image with the default settings first to get an idea of how the effect works. Notice the stripes that run through the image; you can change this to circles or squares depending on your image. Think of the basic color as the midtones and the other colors controlling the highlights, quartertones and shadows. Experiment with the colors until you get what you want. There is no preview function so you need to render and undo as you learn how to use the effect.

    4
    Color Change

    Try changing one color at a time and adjust the threshold. You can also try changing the thickness and corn size to change the impact. After making a color change, undo the change and then change another color. Keep doing this until you feel you understand the impact the changes have on the image.

    5
    Final Image

    Once you have experimented, make the changes you want and click OK to create the image. Save the image under a new name to protect the integrity of your image archive. You can then add stylized text to finish your poster.

    Enhance your photography skill,The Top Secret Photography Techniques

    . The result will be an image that mimics the Obama "Hope" poster. This is an easy way to create an artistic poster image from one of your existing images. Although the popularity of the Shepard Fairey style will eventually wane, the tool will remain as an easy way to create an art poster from a photo.


  • Shepard Fairey - OBEY GIANT - WORLDWIDE PROPAGANDA

    www.obeygiant.com/headlines/obama

    OBAMA - WORLDWIDE PROPAGANDA DELIVERY ... UPDATE: Thanks for all those who bought the print in support of OBEY and OBAMA.


  • Shepard Fairey

    www.obeygiant.com

    AKA Andre the Giant Has a Posse. A street art project and an experiment in phenomenology by artist and skateboarder Shepard Fairey. Stickers, posters, links,


  • Tutorial de Efecto Obama (Shepard Fairey) - YouTube

    www.youtube.com/watch?v=ckGwiQG40qU

    *ENLACES DE INTERS Blog --- http://ps-tutoriales.blogspot.com/ Facebook --- https://www.facebook.com/groups/15872... Twitter --- http://www ...


  • Photoshopping Obama 'Hope' Posters PhotoGuides

    www.photoguides.net/photoshopping-obama-hope-posters

    Barack Obama's iconic 'Hope' poster is the most recognisable piece of street art of all time. Here you'll learn how to create your own 'Hope' poster using only Photoshop.


  • Obama "Hope" Posters Know Your Meme - Internet Meme

    knowyourmeme.com/memes/obama-hope-posters

    About The Obama Hope Poster is an iconic image of Barack Obama created by graphic designer and street artist Shepard Fairey[1] during the


  • Make Photos Like the Obama Hope Poster at Obamicon.me

    digitivity.org/932/make-photos-like-the-obama-hope-poster-at...

    Remember the iconic Obama poster which became emblematic of the change theme during the 2008 presidential election? It was created by artist Shepard Fairey.


  • Photoshop: How to Make Obama's HOPE POSTER using your

    www.youtube.com/watch?v=j2_YwylZaDE

    Politics aside, Shepard Fairey's iconic Hope poster earned worldwide fame during Barack Obama's 2008 presidential campaign. This is a Photoshop CS5 ...


  • How to Create a Shepard Fairey "Hope" poster in Photoshop

    photoshop-tutorials.wonderhowto.com/how-to/create-shepard-fairey...

    How to Create a Shepard Fairey "Hope" poster in Photoshop. Ash Davies believes that it is important to understand how to properly use Photoshop, especially with the ...


  • CNN Video - Breaking News Videos from CNN.com

    www.cnn.com/videoJustice Politics U.S World

    If you get CNN at home, you can watch it online and on the go for no additional charge.


  • Shepard Fairey - Life and Biography - StencilRevolution.com -

    www.stencilrevolution.com/profiles/shepard-fairey

    Controversy, Copyrights and Graffiti Shepard Fairey is a polarizing figure in the world of street art. His major works have made as much of an impact as